Wednesday, November 20, 2024

Personalized Cutting Board Ideas That Buyers Can’t Resist

- 0 comments
Personalized Cutting Board Ideas That Buyers Can’t Resist

Personalized Cutting Boards: Ideas That Sell

Cutting boards are essential kitchen tools, but they can also be charming and unique decorative elements. By offering personalized cutting boards, you can tap into a market seeking thoughtful gifts and personalized home décor. The possibilities for customization are endless, allowing you to create cutting boards that truly resonate with your customers.

Engraved Cutting Boards: A Classic Choice

Engraving remains a timeless method for personalizing cutting boards. This technique allows for clear and crisp details, making it ideal for adding names, dates, special messages, or even intricate designs. Consider offering:

  • Family Names and Initials: A classic choice for personalized cutting boards, adding a family name or initials creates a sense of personalization and belonging.
  • Anniversary or Wedding Dates: Commemorate special occasions with engraved dates, turning a practical kitchen tool into a cherished keepsake.
  • Personalized Quotes: Include meaningful quotes about family, cooking, or life in general, adding a touch of sentimentality to the cutting board.
  • Custom Designs: Offer a selection of pre-designed patterns, or allow customers to upload their own images or logos for a truly unique touch.

Beyond Engraving: Embracing Diverse Customization Options

While engraving is a popular choice, explore other personalization techniques to broaden your appeal and offer unique options. Consider:

Laser Etching

Laser etching provides a sophisticated look with intricate details, perfect for creating detailed patterns, logos, or even photographs. This technology is ideal for creating personalized cutting boards that are both functional and visually stunning.

Painted Designs

Adding a splash of color with custom painted designs can transform a simple cutting board into a statement piece. Consider offering:

  • Floral Motifs: Elegant and timeless, floral patterns bring a touch of nature and charm to the kitchen.
  • Geometric Patterns: Modern and trendy, geometric patterns offer a clean and minimalist aesthetic.
  • Personalized Portraits: Create unique cutting boards featuring pet portraits, family photos, or even portraits of favorite food items.

Inlaid Designs

Inlay techniques involve using contrasting wood species to create intricate designs, adding a tactile and visual dimension to your cutting boards. This process allows you to create custom patterns, monograms, or even miniature landscapes.

Target Your Audience with Themed Designs

Tailoring your personalized cutting boards to specific interests or occasions can increase their appeal. Explore:

  • Holiday-Themed Boards: Offer festive designs for Christmas, Thanksgiving, Easter, or other holidays, creating unique and memorable gifts.
  • Sports-Themed Boards: Cater to sports enthusiasts with team logos, player names, or sports-related quotes.
  • Hobby-Themed Boards: Create cutting boards featuring designs related to hobbies like gardening, fishing, or music, making them a perfect gift for passionate individuals.

By embracing diverse personalization techniques and targeting specific audiences with themed designs, you can create cutting boards that buyers will truly appreciate. These unique and customized creations will not only enhance the kitchen experience but also serve as cherished reminders of special occasions, hobbies, and loved ones.
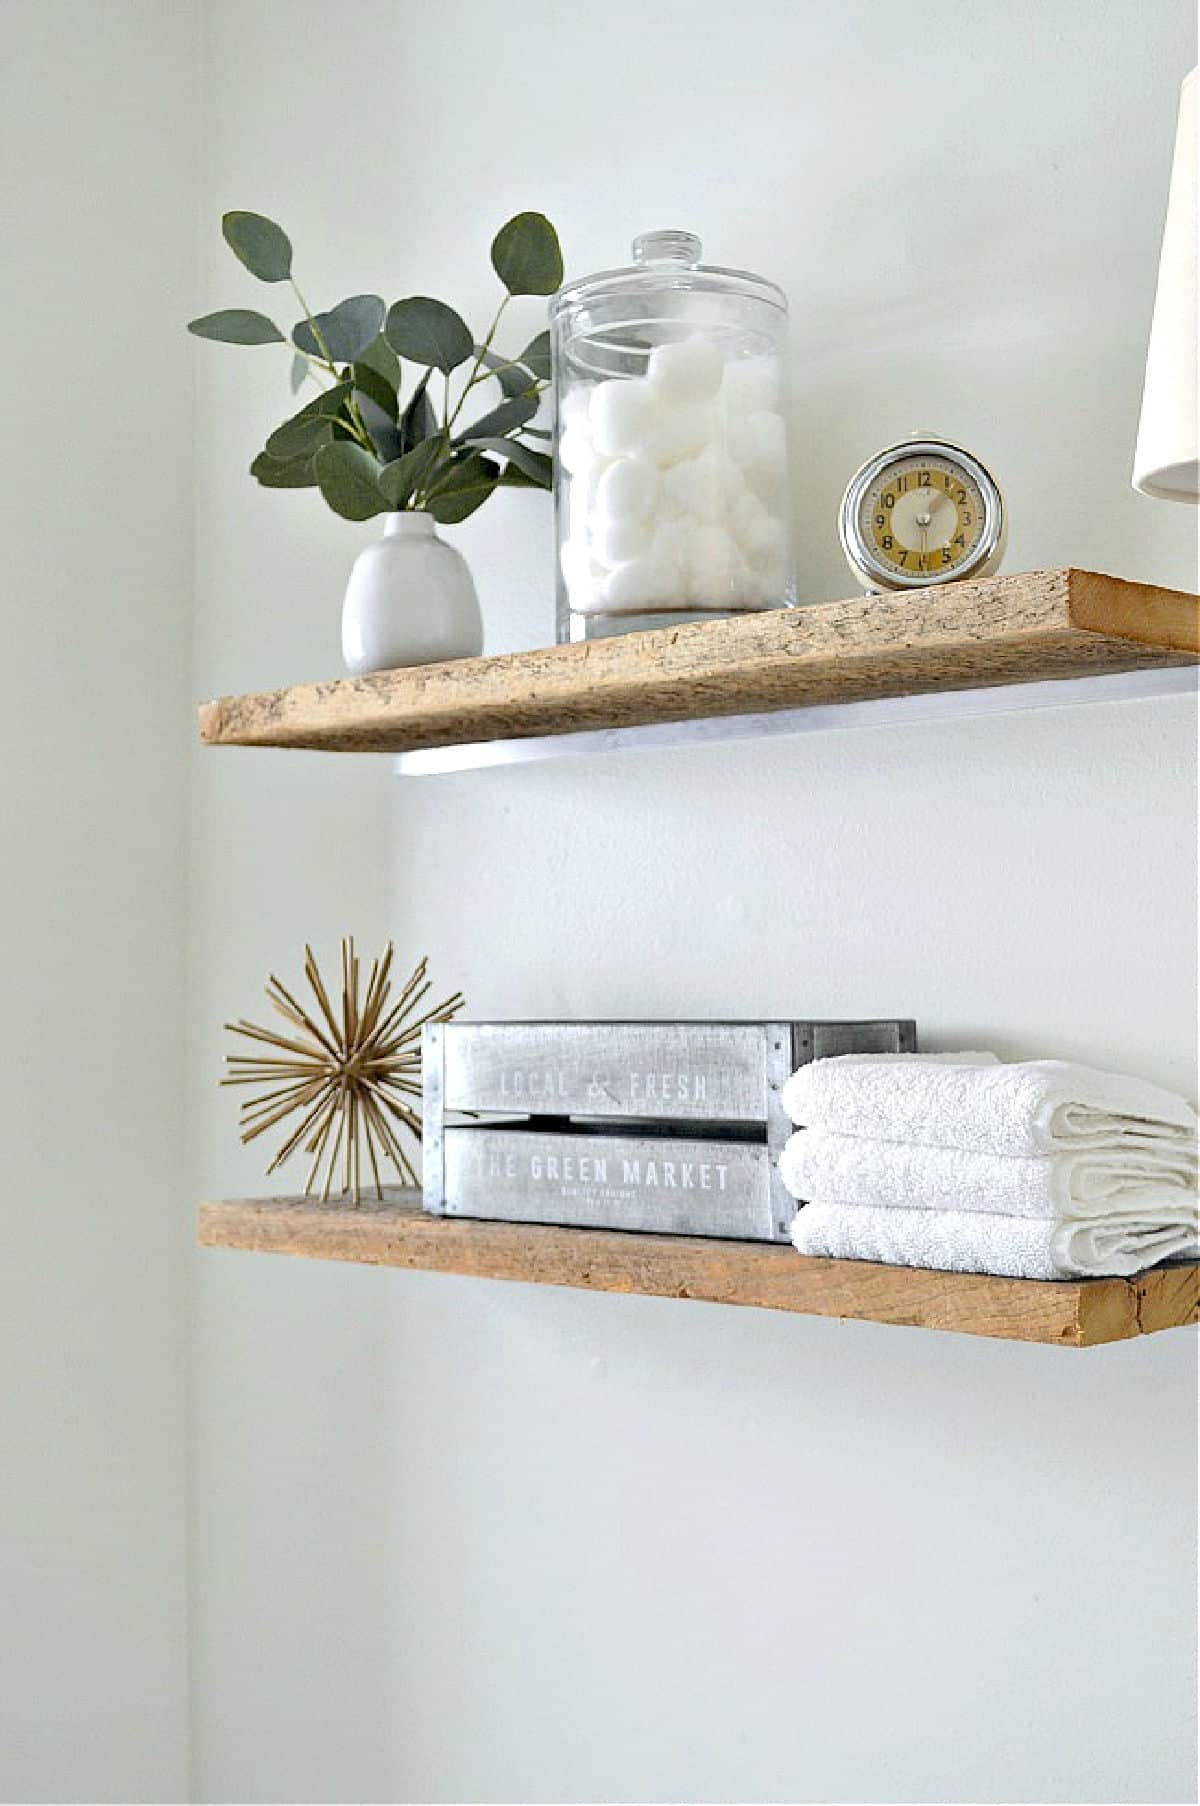
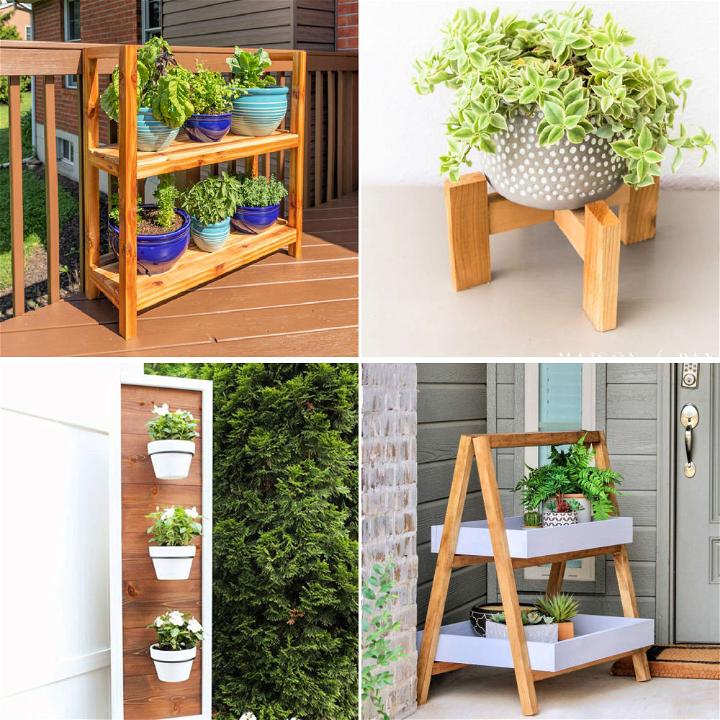
[Continue reading...]

Tuesday, November 19, 2024

How to Make Floating Shelves Using Plywood and Brackets

- 0 comments
How to Make Floating Shelves Using Plywood and Brackets

How to Build Floating Shelves with Plywood and Brackets: A Step-by-Step Guide

Floating shelves, with their sleek, minimalist design, are all the rage. They can add instant style and storage to any room, from your living room to your kitchen, bedroom, or bathroom. And the best part? You don't need to be a carpentry whiz to build them! With a little bit of plywood, some brackets, and a few basic tools, you can whip up your own floating shelves in an afternoon.

This guide will walk you through the entire process, from selecting materials to installing your new shelves. So grab your tools, put on your DIY hat, and let's get started!

Choosing Your Materials

Before you jump into the project, let's talk about the essentials.

Plywood

The heart of your floating shelves is the plywood. Plywood comes in different thicknesses, and the right thickness depends on the weight of the items you plan to store. Here's a general guideline:

  • For lightweight items like books or decorative pieces, 1/2-inch plywood is usually sufficient.
  • For heavier items, consider using 3/4-inch or even 1-inch plywood.

You'll also want to think about the type of plywood. If you want a natural look, go for a wood veneer. If you prefer something more modern, consider a painted or stained plywood.

Brackets

Brackets are the unsung heroes of floating shelves. They're the hidden support that keeps everything in place. Here's what to consider when choosing your brackets:

  • Material: Brackets come in various materials, from sturdy metal to sleek acrylic. Choose one that complements your shelf's style and matches the wall's color if you want a clean, seamless look.
  • Size: The size of your bracket will depend on the length of your shelf and the weight it needs to hold.
  • Style: Brackets come in many styles, from simple and modern to intricate and decorative. Choose a style that matches your design aesthetic.

It's always a good idea to purchase a few extra brackets, just in case you need them for future projects or in case of an accidental drop!

Additional Materials

You'll also need a few other supplies to complete your project:

  • Measuring tape: To get those dimensions just right!
  • Pencil: For marking cuts and transferring measurements.
  • Saw: A circular saw or jigsaw will be your best friend for making accurate cuts.
  • Sandpaper: To smooth out any rough edges and prepare the surface for staining or painting.
  • Level: For ensuring that your shelves are perfectly straight and level.
  • Drill: For pre-drilling holes and securing the brackets.
  • Screws: For attaching the brackets to the wall and the shelves to the brackets.
  • Wood glue: (Optional) For extra stability, you can add a bead of wood glue to the connection points between the brackets and the shelves.
  • Stain or paint: (Optional) To add a finishing touch to your shelves.

Cutting and Sanding Your Shelves

Now that you have all your supplies, it's time to get down to the nitty-gritty.

  1. Measure and cut the plywood. Decide on the length and width of your shelves, keeping in mind the space you have available and the items you want to display. Use your measuring tape to mark the dimensions on the plywood, and then carefully cut it with your saw.
  2. Sand the edges. To prevent splinters and create a smooth finish, sand the edges of the plywood with your sandpaper. Start with a coarser grit sandpaper and gradually work your way to a finer grit.
  3. Mark the bracket positions. Decide where you want to place your brackets on the shelves. Use your measuring tape to mark the locations on the underside of the shelves. Make sure the brackets are evenly spaced and positioned far enough from the edges to provide adequate support.

Installing the Brackets

Now that your shelves are cut and sanded, it's time to install the brackets.

  1. Mark bracket positions on the wall. Using a level and a pencil, mark the locations where you want to install the brackets on your wall. Ensure that the marks are level and in line with the bracket positions you've chosen on the shelves.
  2. Pre-drill pilot holes. Before driving screws into the wall, it's best to pre-drill pilot holes slightly smaller than the screws. This will help prevent the wood from splitting and make installation easier.
  3. Install the brackets. Attach the brackets to the wall by driving screws through the pre-drilled holes. Double-check that the brackets are level and secure.

Attaching the Shelves to the Brackets

You're almost there! Now it's time to attach your shelves to the brackets.

  1. Position the shelf over the brackets. Gently place the shelf over the brackets, ensuring it's sitting securely and level.
  2. Secure the shelves. Screw the shelves to the brackets using appropriate-length screws. Make sure the screws are long enough to go through the shelf and into the bracket but not so long that they protrude through the top of the shelf.
  3. Add wood glue (optional). For extra stability, you can apply a bead of wood glue along the underside of the shelf where it meets the brackets before attaching it. Let the glue dry completely before adding any weight to the shelves.

Finishing Touches

Your floating shelves are almost ready to shine!

  1. Sand and smooth. If needed, you can sand down any rough edges or uneven spots that may have appeared during the installation process.
  2. Stain or paint. Now's the time to add your personal touch! If you want to stain or paint your shelves, do it now. Make sure the stain or paint is compatible with the type of plywood you're using.
  3. Let it dry. Give the stain or paint ample time to dry thoroughly before adding anything to the shelves.

Commonly Asked Questions

Building floating shelves is a fantastic DIY project, but you might have some questions. Here are some answers to common ones:

What if my wall is drywall?

No problem! When installing floating shelves on drywall, it's essential to use drywall anchors. These anchors provide a secure grip and prevent the screws from pulling out of the wall. Choose the right size anchor based on the weight of the shelves and the type of drywall.

How do I know what size bracket to use?

The size of the bracket depends on the length of the shelf and the weight you're planning to put on it. Longer shelves will need larger brackets to provide adequate support. Check the manufacturer's recommendations for weight capacity and choose brackets that can safely hold the weight of your chosen items.

Can I use reclaimed wood for my shelves?

Absolutely! Reclaimed wood adds a rustic charm and character to your shelves. Just be sure to check the wood for any signs of rot or damage before using it for your project.

Can I add lighting to my floating shelves?

Yes! Adding lighting can really make your shelves pop. You can use under-shelf lighting, which is typically mounted to the bottom of the shelf and casts a warm glow upwards. Or you can use LED strips that are easily installed on the backside of the shelves.

How do I make sure my shelves are level?

A level is your best friend! Make sure you use it every step of the way. Use it to mark the bracket positions on the wall, to check that the brackets are installed correctly, and to make sure the shelf is level before you secure it to the brackets.

With a little patience and some helpful tips, you'll be enjoying your new floating shelves in no time! It's a DIY project that's both satisfying and beautiful, and the results are sure to impress.

[Continue reading...]

Step-by-Step Guide to Making Wooden Plant Stands for Sale

- 0 comments
Step-by-Step Guide to Making Wooden Plant Stands for Sale

A Comprehensive Guide to Crafting Wooden Plant Stands for Sale

In the realm of home decor, wooden plant stands have emerged as a sought-after commodity, adding a touch of rustic elegance and functionality to interior spaces. For aspiring entrepreneurs and woodworking enthusiasts, crafting and selling these versatile pieces can be a rewarding endeavor. This comprehensive guide will equip you with the knowledge and skills necessary to embark on this exciting journey.

1. Planning and Design

Before diving into the construction process, meticulous planning and design are crucial. This stage sets the foundation for a successful project and ensures that your plant stands meet your target market's expectations.

1.1. Market Research

Thorough market research is essential to gain insights into consumer preferences and identify profitable niche markets. Explore online platforms, home decor magazines, and local furniture stores to understand current trends and popular styles. Consider factors such as:

  • Target audience: Determine the demographics and aesthetic preferences of your intended customers.
  • Competition: Analyze the offerings and pricing of competitors to identify potential opportunities and differentiate your products.
  • Market demand: Assess the current demand for wooden plant stands and identify areas of growth.

1.2. Design Concepts

Once you have a clear understanding of the market, it's time to brainstorm design concepts. Consider the following factors:

  • Size and shape: Determine the optimal dimensions and overall shape of your plant stands to accommodate various plant sizes and fit different interior spaces.
  • Style: Choose a style that aligns with your brand and target audience. Options include rustic, modern, minimalist, farmhouse, and industrial.
  • Materials: Select high-quality wood species that are durable, aesthetically pleasing, and suitable for your chosen design. Popular choices include pine, oak, walnut, and cedar.
  • Features: Incorporate unique features that add value and appeal to your plant stands, such as decorative details, multiple tiers, or integrated storage compartments.

1.3. Prototype Development

Before committing to large-scale production, it's advisable to create prototypes to test your designs and refine your construction techniques. Use scrap wood or readily available materials to build a few sample plant stands. This allows you to:

  • Evaluate the design's practicality: Assess the stability, functionality, and aesthetics of your prototype.
  • Refine the construction process: Identify potential challenges and optimize your workflow for efficient production.
  • Gather feedback: Share your prototypes with potential customers and seek their feedback on design preferences and pricing.

2. Materials and Tools

Having the right materials and tools is crucial for creating high-quality wooden plant stands. This section provides a comprehensive list of essential items.

2.1. Wood

Select high-quality wood species that are durable, resistant to moisture, and aesthetically pleasing. Consider factors such as:

  • Hardness: Harder woods like oak and walnut are more durable but may be challenging to work with.
  • Grain pattern: The grain pattern of wood adds visual appeal and can influence the overall aesthetic of your plant stands.
  • Color: Choose wood species with colors that complement your chosen design and target market preferences.
  • Availability and cost: Factor in the availability and cost of different wood species when making your selection.

2.2. Hardware

Essential hardware includes:

  • Screws: Select screws of appropriate length and type for joining wood pieces securely.
  • Wood glue: Use high-quality wood glue to bond wood components for added strength and durability.
  • Finishing nails: Finishing nails are used for attaching decorative trim or other elements.
  • Sandpaper: Use various grits of sandpaper to smooth wood surfaces and remove imperfections.
  • Wood stain or paint: Choose a finish that complements your design and protects the wood from moisture and scratches.

2.3. Tools

The necessary tools for crafting wooden plant stands include:

  • Saw: A table saw or circular saw is essential for cutting wood to precise dimensions.
  • Drill: A drill with a variety of drill bits is needed for creating pilot holes for screws and other tasks.
  • Screwdriver: A screwdriver is essential for driving screws and fastening wood components.
  • Measuring tape and ruler: Accurate measurement tools are crucial for precise cutting and assembly.
  • Clamps: Clamps are used to hold wood pieces together securely during assembly.
  • Sanding block: Use a sanding block to smooth wood surfaces and prepare them for finishing.
  • Safety equipment: Always wear safety glasses, ear protection, and a dust mask when using power tools.

3. Construction Process

The construction process involves a series of steps, from cutting wood to finishing the product. This section outlines the key stages.

3.1. Cutting and Shaping

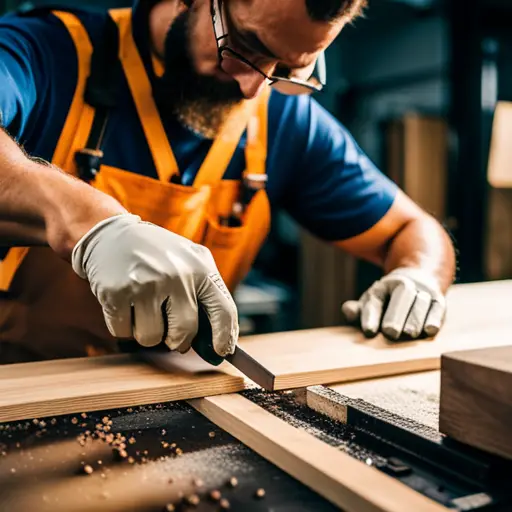
Begin by carefully cutting the wood to the desired dimensions for each part of the plant stand. Use a table saw, circular saw, or jigsaw to ensure precise cuts. Once the wood pieces are cut, shape them as needed using a router, sander, or other tools. Be sure to use appropriate safety precautions when working with power tools.

3.2. Assembly

Once the individual parts are prepared, assemble the plant stand following your design plans. Use wood glue and screws to secure the joints, ensuring that the stand is sturdy and balanced. If your design incorporates multiple tiers, create a stable base with support beams or brackets. For added strength, you can reinforce the joints with wood dowels or metal brackets.

3.3. Finishing

After assembly, sand all surfaces of the plant stand to create a smooth finish. This removes any rough edges or imperfections. Then, apply your chosen finish, such as wood stain, paint, or varnish. The finish protects the wood from moisture and scratches and enhances the aesthetic appeal. Apply the finish in thin coats, allowing each coat to dry completely before applying the next.

4. Marketing and Sales

Once your plant stands are crafted, it's time to market and sell your creations. This section provides essential strategies for attracting customers and generating revenue.

4.1. Branding and Pricing

Develop a strong brand identity that reflects your unique selling proposition and target market. Create a memorable brand name, logo, and visual style for your products. Determine your pricing strategy, considering factors such as materials, labor costs, and market competition. Research pricing strategies to ensure profitability while remaining competitive.

4.2. Online Sales

Leverage the power of online platforms to reach a wider audience and sell your plant stands. Set up an online store through platforms such as Etsy, Shopify, or your own website. Optimize your product listings with high-quality images, detailed descriptions, and relevant keywords to increase visibility in search results. Promote your products on social media platforms and engage with potential customers through targeted advertising campaigns.

4.3. Local Markets and Events

Participate in local farmers markets, craft fairs, and home decor shows to showcase your plant stands directly to customers. These events offer opportunities for face-to-face interaction, direct sales, and valuable feedback. Prepare a well-designed display that highlights your products' features and benefits. Offer attractive discounts or promotions to incentivize purchases.

5. Conclusion

Crafting and selling wooden plant stands can be a fulfilling and profitable venture. By following this comprehensive guide, you will equip yourself with the knowledge and skills to design, construct, market, and sell high-quality products that appeal to your target audience. Remember to focus on quality craftsmanship, creative designs, and effective marketing strategies to achieve success in this burgeoning market.

[Continue reading...]

Monday, November 18, 2024

How to Build Wooden Magazine Racks with Customizable Dividers

- 0 comments
How to Build Wooden Magazine Racks with Customizable Dividers

Build Your Own Customizable Wooden Magazine Rack

Tired of your magazines and newspapers cluttering up your coffee table? A custom-built magazine rack is the perfect solution! Not only will it keep your reading material organized, but it can also be a stylish addition to your home. Building your own rack is surprisingly easy and allows you to create a piece that perfectly fits your space and style.

In this guide, we'll walk through the steps of building a wooden magazine rack with adjustable dividers. Whether you're a seasoned woodworker or a DIY newbie, this project is manageable and rewarding. So grab your tools, gather your materials, and let's get started!

Choosing Your Materials

The first step is selecting the materials for your magazine rack. Here's a rundown of the most popular options:

Wood Types

For a magazine rack, you'll want a sturdy yet lightweight wood that's easy to work with. Consider these options:

  • Pine: Affordable, lightweight, and readily available. It's perfect for beginners as it's easy to cut and sand.
  • Oak: A strong, durable wood that lends itself to beautiful finishes. It's a bit pricier than pine but offers excellent longevity.
  • Birch: Another popular choice for its strength and smooth grain. It's slightly more expensive than pine but offers better stability.
  • Plywood: A cost-effective option that provides excellent stability. You can find plywood in a variety of thicknesses, making it suitable for both basic and intricate designs.

Hardware

You'll need some basic hardware to assemble your magazine rack:

  • Wood glue: This will bond the wood pieces securely. Choose a strong, high-quality wood glue for the best results.
  • Screws: You'll use screws to attach the dividers and legs to the main rack frame.
  • Wood screws: Use these to secure the dividers to the frame. Choose screws that are long enough to penetrate the wood but not so long that they poke out the other side.
  • Pocket hole screws: These are a great option for invisible joinery. They create a strong joint while keeping the screw heads hidden.
  • Sandpaper: Use sandpaper to smooth out any rough edges and prepare the wood for finishing.
  • Wood filler: This will help fill any gaps or imperfections in the wood. Choose a wood filler that matches the color of your wood.
  • Finishing supplies: This includes wood stain, paint, or polyurethane, depending on the desired look for your rack.

Choosing Your Design

Once you've chosen your materials, it's time to decide on the design of your magazine rack. Here are some ideas to get you started:

Classic Magazine Rack Design

This is a simple and functional design that features a basic frame with dividers. It can be made with a single piece of wood or multiple pieces joined together. This design can be easily customized with different sizes and finishes.

Staggered Magazine Rack Design

This design creates a more dynamic look by stacking the shelves at different heights. This allows for more visual interest and can create a more spacious feel.

Wall-Mounted Magazine Rack Design

Save floor space with a wall-mounted magazine rack. This design is great for small spaces and can be customized with shelves, compartments, or even a combination of both.

Multi-Purpose Magazine Rack Design

Transform your magazine rack into a functional and stylish piece of furniture. Include additional features like drawers, storage baskets, or even a built-in light for an extra touch.

Step-by-Step Instructions

Now that you have your materials and design, it's time to start building! Here's a step-by-step guide:

Step 1: Cut the Wood

Using your design as a guide, carefully cut the wood pieces to the desired size. Make sure your cuts are precise to ensure your rack is sturdy. If you're using plywood, be sure to cut along the grain for added strength. You'll need to cut pieces for the base, sides, dividers, and legs.

Step 2: Assemble the Frame

Once all the pieces are cut, you can start assembling the frame. You can use glue, screws, or both to secure the pieces together. If you're using screws, pre-drill holes to prevent the wood from splitting. The frame will be the foundation for your magazine rack. Attach the sides to the base and the top pieces to complete the frame.

Step 3: Add the Dividers

The dividers are what will create the individual compartments for your magazines. You can make them adjustable by using a simple sliding system or by creating slots in the frame that the dividers fit into. You can also add more dividers for different sizes of magazines. Secure the dividers to the frame with glue, screws, or a combination of both.

Step 4: Attach the Legs

If you want your magazine rack to stand freely, you'll need to attach legs. These can be simple wood blocks or more elaborate legs with decorative elements. Attach the legs to the base of the frame using glue and screws. Make sure the legs are evenly spaced and secure for a stable magazine rack.

Step 5: Sand and Finish

Sand the entire magazine rack with sandpaper, starting with coarse grit and finishing with fine grit. This will remove any rough edges and create a smooth surface. Once the sanding is complete, you can finish your rack with stain, paint, or polyurethane, depending on your desired look. Let the finish dry completely before using your rack.

Tips for Building a Magazine Rack

Here are some helpful tips to make your magazine rack building experience smoother:

  • Measure twice, cut once. Accuracy is crucial for a sturdy and well-constructed rack.
  • Use a miter saw or table saw for clean cuts.
  • Sand the wood thoroughly before applying any finish. This will ensure a smooth and even finish.
  • Use a good quality wood glue and screws. This will help ensure your rack is sturdy and long-lasting.
  • Don't rush the project. Take your time and enjoy the process. Your magazine rack will be much more rewarding if it's made with care.

Commonly Asked Questions

What kind of wood is best for a magazine rack?

Pine, oak, birch, and plywood are all good choices for a magazine rack. Pine is the most affordable, while oak and birch offer more durability. Plywood is a cost-effective option that provides good stability. It depends on your budget and desired level of sturdiness.

How do I make the dividers adjustable?

You can make the dividers adjustable by creating slots in the frame for the dividers to slide into or by using a simple sliding system with metal tracks.

How do I finish my magazine rack?

You can finish your magazine rack with stain, paint, or polyurethane. Stain will enhance the natural beauty of the wood, paint will provide a solid color, and polyurethane will protect the wood from scratches and water damage. Choose the finish that best suits your style and needs.

How do I make my magazine rack unique?

You can make your magazine rack unique by adding personal touches, such as decorative hardware, custom paint, or even by incorporating unique wood patterns. Think outside the box and have fun with it!

Creating a magazine rack is a fun and rewarding project. With a little patience and creativity, you can build a stylish and functional piece that you'll love for years to come. Happy crafting!

[Continue reading...]

Friday, November 15, 2024

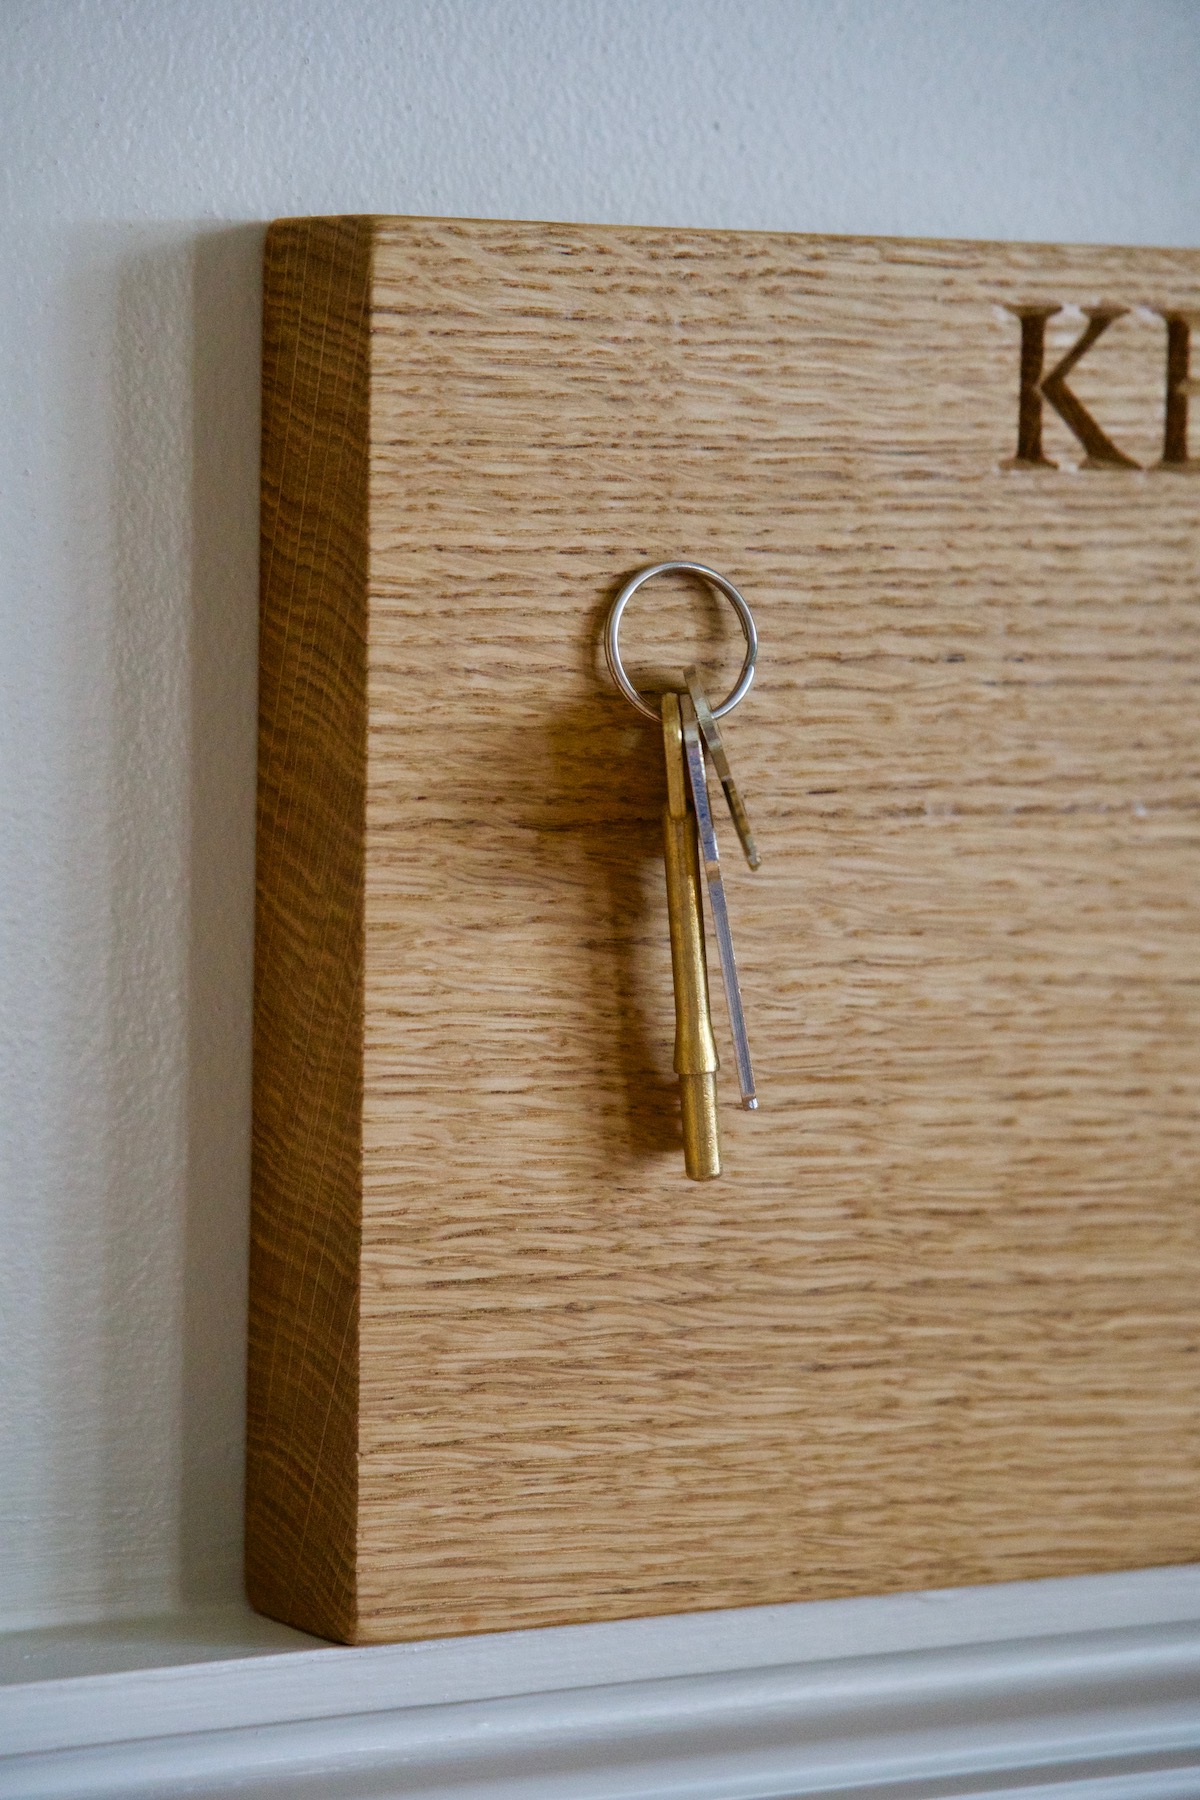
Wooden Key Racks for Organizing Keys, Mail, and Other Small Items

- 0 comments
Wooden Key Racks for Organizing Keys, Mail, and Other Small Items

Wooden Key Racks for Organizing Keys, Mail, and Other Small Items

In the whirlwind of daily life, it's easy for small items to get lost in the shuffle. Keys, mail, and other essentials can quickly turn into a chaotic mess, leaving you scrambling at the last minute. Enter the wooden key rack: a simple yet elegant solution for organizing these everyday necessities. Not only are they functional, but they also add a touch of warmth and charm to any entryway or workspace. This article will explore the many benefits of wooden key racks, providing a comprehensive guide to choosing the perfect one for your needs.

The Versatility of Wooden Key Racks

Wooden key racks are far more than just a place to hang keys. They serve as a central hub for organizing a multitude of small items, offering a dedicated space for everything from mail and sunglasses to hats and scarves.

Organizing Keys

Their primary purpose, of course, is to keep keys organized. Wooden key racks provide dedicated hooks or slots for each family member, eliminating the frustration of searching for the right set of keys in a jumbled pile.

Storing Mail

Many wooden key racks feature additional compartments or shelves for storing mail. These compartments keep mail organized and easily accessible, eliminating clutter and ensuring important documents aren't lost in a pile.

Managing Other Small Items

Beyond keys and mail, wooden key racks can hold a variety of other small items. Some models include hooks for hanging bags, umbrellas, or even dog leashes. Shelves can accommodate small items like sunglasses, wallets, or even decorative accents.

Advantages of Wooden Key Racks

Wooden key racks offer a range of advantages, making them a practical and aesthetically pleasing addition to any home or office.

Durability

Wooden key racks are inherently durable and long-lasting. Quality wood construction ensures they can withstand daily use without breaking or becoming damaged.

Natural Beauty

The warmth and natural beauty of wood add a touch of elegance to any space. Whether you choose a rustic, modern, or minimalist design, the natural grain of wood will enhance the aesthetics of your entryway, kitchen, or office.

Customization

Wooden key racks offer endless customization options. Choose from a variety of wood types, finishes, and designs to create a piece that perfectly complements your existing décor. You can even personalize the rack with family names or initials.

Choosing the Right Wooden Key Rack

Selecting the right wooden key rack requires careful consideration of your specific needs and preferences.

Size and Capacity

The size and capacity of the rack are crucial factors. Consider the number of family members and the volume of items you need to store. Smaller racks are suitable for single-person households or limited storage needs, while larger racks offer ample space for families or those who require more storage.

Style and Design

Think about your overall décor and choose a style that complements it. Modern key racks often feature sleek lines and minimalist designs. Rustic styles often embrace distressed finishes and natural wood textures.

Functionality

Consider the specific features you need. Some racks have integrated shelves for mail, while others feature hooks for hanging bags or umbrellas. Evaluate your individual requirements to ensure the rack meets your storage needs.

Where to Place Your Wooden Key Rack

The placement of your wooden key rack is key to maximizing its functionality and aesthetic appeal.

Entryway

The entryway is the most popular spot for a key rack. Its proximity to the front door makes it easy to grab your keys on the way out and hang them up upon arrival.

Kitchen

A kitchen key rack can be a convenient solution for storing keys, mail, and other small items. Its proximity to the fridge and countertops makes it easily accessible for busy families.

Office

Wooden key racks can also enhance organization in an office. Use it to hang keys, store important documents, or even display business cards.

DIY Wooden Key Racks

If you're feeling crafty, creating your own wooden key rack can be a fun and rewarding project. Numerous online resources offer DIY tutorials and plans for various styles of key racks.

Materials

Common materials for DIY wooden key racks include:

  • Wood planks
  • Hooks
  • Screws
  • Wood glue
  • Stain or paint

Instructions

Most DIY wooden key rack instructions involve the following steps:

  • Cut the wood planks to the desired size
  • Attach hooks to the planks
  • Assemble the planks and hooks
  • Apply stain or paint to the finished rack

Conclusion

Wooden key racks offer a simple yet elegant solution for organizing keys, mail, and other small items. Their durability, natural beauty, and customizable options make them a practical and stylish addition to any home or office. By considering your specific needs and preferences, you can choose the perfect wooden key rack to keep your belongings organized and easily accessible.

[Continue reading...]

Bath Tray Ideas That Add a Touch of Luxury to Any Bathroom

- 0 comments
Bath Tray Ideas That Add a Touch of Luxury to Any Bathroom

Bath Tray Ideas That Add a Touch of Luxury to Any Bathroom

Transform your ordinary bath into a luxurious spa experience with the addition of a bath tray. These versatile accessories go beyond just holding a glass of wine, offering a platform to enhance your bathing routine with a touch of elegance and practicality. From simple bamboo trays to ornate wooden designs, there's a perfect bath tray to suit every style and preference.

The Benefits of a Bath Tray

Bath trays provide a multitude of benefits, making them an essential addition to any bathroom. Here's why you should consider adding one to your bathroom routine:

Convenience and Organization

No more precarious balancing acts with a book or glass of wine. A bath tray creates a stable and organized surface, keeping your essentials close at hand. From candles and bath salts to your favorite book or a soothing cup of tea, everything has its place.

Relaxation and Pampering

A bath tray elevates your bathing experience from mundane to luxurious. Imagine soaking in a warm bath while indulging in a scented candle, a refreshing beverage, and a captivating book. A bath tray transforms your bathroom into a personal sanctuary for relaxation.

Enhanced Atmosphere

A stylish bath tray adds a touch of sophistication to your bathroom décor. Choose a tray that complements your existing bathroom design, whether it's sleek and modern or rustic and charming.

Types of Bath Trays

The variety of bath trays available ensures you find the perfect fit for your bathroom and preferences. Here are some popular types:

Bamboo Bath Trays

Bamboo trays are a popular choice for their natural beauty, affordability, and durability. They provide a warm and earthy feel, blending seamlessly with various bathroom styles.

Wooden Bath Trays

Wooden bath trays exude a timeless elegance and sophistication. Opt for a tray made from rich mahogany, walnut, or teak for a luxurious touch. These trays are often handcrafted, adding a unique touch to your bathroom.

Metal Bath Trays

Metal bath trays offer a modern and sleek aesthetic. Look for trays made from stainless steel, brass, or copper to add a contemporary touch. These trays are typically lightweight and easy to clean.

Creating a Luxurious Bath Experience with Your Bath Tray

Elevate your bath routine with these tips:

  • Light Candles: Create an ambiance of tranquility and relaxation with scented candles.
  • Prepare a Soothing Beverage: Enjoy a cup of herbal tea or a refreshing glass of wine while you soak.
  • Read a Book or Magazine: Lose yourself in a good book or browse your favorite magazine.
  • Play Relaxing Music: Create a calming soundtrack with gentle music or nature sounds.
  • Add Bath Salts or Essential Oils: Enhance the experience with aromatic bath salts or essential oils.

With a little creativity and the right accessories, you can transform your bathroom into a luxurious retreat. A bath tray is an investment in your well-being, allowing you to enjoy relaxing and rejuvenating baths in the comfort of your own home.

[Continue reading...]

Dado Woodworking Techniques Every Woodworker Should Know

- 0 comments
Dado Woodworking Techniques Every Woodworker Should Know

Dado Woodworking Techniques Every Woodworker Should Know

Dado joints, those rectangular slots cut into the edge or face of a piece of wood, are a staple in woodworking for good reason. They provide a strong, precise, and visually appealing method for joining wood pieces together. Whether you're building cabinets, shelves, or furniture, mastering dado techniques will elevate your woodworking skills and lead to professional-looking results.

Understanding Dado Joints

The essence of a dado joint lies in its simplicity: two pieces of wood are joined by interlocking grooves and ridges. The groove, or dado, is cut into one piece of wood, while the corresponding ridge is created on the other. This creates a strong, flush, and visually appealing joinery. The most common method for cutting dados is with a table saw, although dado sets can be used with other tools like routers or chop saws.

Essential Tools and Techniques

Before diving into dado cutting, gather the necessary tools and familiarize yourself with the techniques:

The Dado Set

A dado set is a specialized set of saw blades designed specifically for cutting dados. It typically consists of two outer blades, which define the width of the dado, and one or more chipper blades that remove the waste material. Dado sets are available in various sizes, so choosing the right one is crucial for your project. When selecting a dado set, consider the desired width of the dado and the thickness of the wood you'll be cutting.

The Table Saw

The table saw is the most common tool for cutting dados. It offers precision, control, and the ability to cut dados across the entire width of a workpiece. You'll need a dado set, a table saw, and a miter gauge to cut your dado accurately. Before you start, ensure your table saw is properly aligned and that the dado set is securely installed.

Safety First

Woodworking involves potential risks, and using power tools requires extreme caution. Always wear safety glasses, hearing protection, and a dust mask. Ensure the work area is clean, free of clutter, and well-lit. Never attempt to cut wood while wearing loose clothing or jewelry that could get caught in the machinery. When working with a table saw, always use a push stick to keep your fingers clear of the blade, and never attempt to remove waste material from the blade while the saw is running.

Key Techniques for Success

Successful dado cutting requires a combination of precise measurements, careful setup, and consistent techniques. Here's a breakdown of some key techniques:

Marking and Measuring

Before starting the cutting process, accurate markings are crucial. Carefully mark the exact position and dimensions of the dado on the workpiece. Use a combination square and a pencil to ensure that your markings are precise. When measuring, double-check your measurements to avoid errors. Once you're confident in your markings, use a sharp chisel or router to create a starting groove for the dado set. This will help the saw blade guide more smoothly and prevent it from wandering.

Setting Up the Table Saw

Proper setup is essential for clean and precise cuts. Mount the dado set on your table saw, ensuring it is properly aligned and secured. Use a miter gauge to position the workpiece accurately against the fence. Adjust the height of the blade to match the desired depth of the dado. For accurate depth adjustments, use a depth gauge and a marker to indicate the precise depth on the blade.

Cutting the Dado

With the workpiece securely positioned on the table saw, use a firm and steady motion to guide it through the dado set. Apply moderate pressure to keep the workpiece firmly against the fence. Avoid using excessive force, as this can cause the blade to bind or wander. If the dado is deeper than the height of the blade, make multiple passes, gradually increasing the depth with each pass. For each pass, reposition the workpiece to ensure that the cut is consistent and precise.

Expanding Your Dado Skillset

Once you've mastered the fundamentals of dado cutting, explore more advanced techniques to enhance your woodworking projects:

Using a Router for Dados

While table saws are commonly used, routers can also be effective tools for cutting dados. A router offers flexibility and allows you to create more intricate dados. Using a dado bit or a stacked set of router bits, you can create dados of various shapes and sizes. However, router dado cutting requires more precision and practice, and it's crucial to use a fence or jig for accurate cuts.

Creating Stop Dados

Stop dados, also known as "blind dados," are dadoes that don't extend completely through the workpiece. They are useful for creating hidden joints or for creating a decorative effect. To create a stop dado, simply use a stop block to limit the depth of the cut. This can be done with a table saw or a router. Use a stop block to prevent the blade or router bit from going through the workpiece entirely.

Experimenting with Dado Variations

Beyond traditional dadoes, explore variations that enhance the visual appeal and functionality of your projects. You can create angled dados, tapered dados, or dadoes with rounded edges. Get creative and experiment with different dado configurations to add unique touches to your woodworking creations.

Conclusion

Mastering dado woodworking techniques opens a world of possibilities for your woodworking endeavors. With proper tools, careful setup, and consistent practice, you can create strong, accurate, and visually appealing dado joints. Whether you're building furniture, cabinets, or intricate decorative pieces, the ability to cut dados with precision will set your woodworking skills apart.

[Continue reading...]

Modern Coffee Table Designs with Unique Features That Will Stand Out

- 0 comments
Modern Coffee Table Designs with Unique Features That Will Stand Out

Modern Coffee Table Designs with Unique Features That Will Stand Out

Let’s face it, the coffee table is the heart of your living room. It's where you gather with friends, settle in for movie nights, and maybe even spill the occasional drink. But it's also a chance to showcase your style and personality. In a world filled with cookie-cutter furniture, we're all craving something a little different, something that speaks to our unique tastes.

That's where modern coffee tables with unique features come in. These aren't your grandma's coffee tables. They're bold, they're innovative, and they're absolutely guaranteed to spark conversation.

Beyond the Ordinary: Unique Coffee Table Features

Forget the boring old rectangular coffee table. Today's modern designs are pushing boundaries and embracing unexpected elements. Here's a look at some of the coolest features you can find:

1. Built-in Storage: A Practical Touch

Let's be honest, clutter is the enemy of a stylish living room. That's why modern coffee tables with built-in storage are becoming increasingly popular. We're talking hidden drawers, secret compartments, and even lift-top mechanisms that reveal storage space underneath. You can finally ditch those unsightly coffee table books and keep your remote controls organized.

2. Integrated Lighting: Mood-Setting Magic

Imagine this: you're hosting a dinner party and the ambiance is just right. But then, you need to find something in your coffee table drawer. Modern coffee tables with integrated lighting solve that problem. Some have discreet LED strips that illuminate the surface, while others feature elegant lamps or even built-in charging stations for your devices.

3. Unexpected Materials: A Statement Piece

From sleek metal to warm wood to eye-catching acrylic, modern coffee tables are playing with materials in exciting new ways. A coffee table crafted from reclaimed wood adds a touch of rustic charm, while a table with a polished metal base delivers a contemporary edge. Don't be afraid to experiment with different textures and finishes to create a unique look.

4. Sculptural Shapes: Breaking the Mold

Who says a coffee table has to be rectangular? Modern designers are embracing organic shapes and unexpected angles. Think flowing curves, geometric patterns, and asymmetrical designs. A sculptural coffee table can be a conversation starter and a work of art in itself.

5. Multifunctionality: Beyond the Basics

Why settle for a coffee table that's just a coffee table? Modern designs are becoming more versatile, incorporating features that go beyond the ordinary. Some coffee tables can be transformed into dining tables with extendable surfaces. Others have built-in bar carts or even serve as a display for your favorite art pieces.

Choosing the Right Modern Coffee Table for Your Style

With so many unique options to choose from, finding the perfect coffee table can feel overwhelming. Here are some tips to help you narrow down your choices:

1. Define Your Style

Do you love minimalist designs? Or are you drawn to something more eclectic? Your personal style should be the foundation for your coffee table choice.

2. Consider the Size of Your Space

Measure your living room carefully before you start shopping. You don't want a table that's too big or too small for the room. Think about how much space you need for seating, walkways, and other furniture.

3. Think About Your Lifestyle

Do you entertain frequently? Do you have kids or pets? These factors will influence your choice. If you need a sturdy, durable coffee table, consider wood or metal over glass or delicate materials.

4. Don't Be Afraid to Be Bold

A coffee table is a great way to showcase your personality. If you're drawn to something unique, don't be afraid to embrace a bold design. A colorful coffee table can be a focal point in your room. A statement piece can add a touch of personality to your living space.

Frequently Asked Questions

Here are some common questions about modern coffee tables with unique features:

1. How much should I spend on a coffee table?

The price of coffee tables can vary greatly depending on the materials, design, and features. You can find budget-friendly options starting around a few hundred dollars, while high-end designs can cost thousands. It's important to set a budget before you start shopping and be realistic about what you can afford.

2. What are some popular materials for modern coffee tables?

Some of the most popular materials include:

  • Wood: Classic, durable, and offers a wide range of styles.
  • Metal: Modern, sleek, and often comes with unique finishes.
  • Glass: Elegant, contemporary, and can create a sense of spaciousness.
  • Acrylic: Clear and translucent, adding a modern touch.
  • Stone: Luxurious, durable, and comes in a variety of colors and patterns.
  • Reclaimed materials: Eco-friendly and adds character to your space.

    3. Where can I find unique coffee table designs?

    You can find modern coffee tables with unique features at a variety of retailers, both online and offline.

  • Specialty furniture stores often carry exclusive and designer pieces.
  • Online marketplaces like Etsy and eBay offer handcrafted and vintage finds.
  • Large retailers like IKEA and West Elm offer a range of styles and price points.

    Don't be afraid to shop around and compare prices before you make a purchase.

    Ultimately, the perfect modern coffee table with unique features is the one that reflects your personal style and fits perfectly into your living room. So, go ahead and embrace your creativity! It's time to create a coffee table that's as unique as you are.

  • [Continue reading...]

    How to Craft Wooden Pencil Holders for Gift-Giving or Office Decor

    - 0 comments
    How to Craft Wooden Pencil Holders for Gift-Giving or Office Decor

    Craft Your Own Wooden Pencil Holders: A Perfect Gift or Desk Decor

    Tired of seeing those boring, plastic pencil holders on your desk? Why not add some personality and charm with a handcrafted wooden pencil holder? This project is great for beginners, and you can customize it to your liking with different wood types, stains, and embellishments. Plus, it makes a thoughtful and unique gift for friends, family, or even your favorite teacher.

    Ready to get started? Let's dive in!

    Supplies You'll Need:

    Here's what you'll need to gather before you begin. Don't worry if you don't have everything on hand - you can usually find most of these at your local craft store:

    • Wood - You can use scrap wood, a piece of plywood, or even a pre-cut piece of wood from a craft store. Choose a wood that's sturdy enough to hold your pencils, but not too thick or heavy. I love using walnut or maple for their beautiful grain.
    • Saw - You'll need a saw to cut the wood to the size you want. A handsaw, jigsaw, or even a table saw will work just fine.
    • Sandpaper - Use various grits of sandpaper to smooth out the wood and create a nice, even surface. Start with a coarser grit and work your way up to a finer grit for a smooth finish.
    • Wood glue - This is needed to secure the pieces of wood together if you're creating a more intricate design.
    • Wood stain (optional) - Stain your holder if you want to add color or enhance the natural beauty of the wood.
    • Polyurethane (optional) - This clear coating helps protect the wood and gives it a nice sheen. You can use a satin or gloss finish depending on your preference.
    • Pencil - To mark your cutting lines!
    • Measuring tape - Measure twice, cut once!
    • Clamps - To hold the pieces of wood together while the glue dries.
    • Safety glasses - Always wear safety glasses when working with tools and wood.

    Choosing Your Design

    The fun really begins when you start thinking about how you want your pencil holder to look. Here are some ideas to get you started:

    • Simple and Classic: A basic rectangular or cylindrical shape is a great starting point. Just cut your wood to the desired height and width, sand it down, and you're good to go!
    • Layered and Fun: Get creative with different shapes and sizes of wood to build up a more interesting design. You could try using a curved piece of wood for the base and then add a rectangular top, for example.
    • Themed Design: Want to personalize your holder? Maybe you're a fan of vintage typewriters, or you're obsessed with nautical themes. Incorporate those elements into your design! You can add decorative elements like metal accents, rope, or even small beads.

    Step-by-Step Instructions

    Let's get this project rolling! Follow these steps to create your own amazing wooden pencil holder. Remember, this is just a guideline - feel free to get creative and experiment!

    1. Plan and Measure

    First, decide on the size and shape you want for your pencil holder. Measure the width and depth you need to comfortably hold your pencils. Also, think about the height - you want it to be tall enough for your pencils and to make a visual impact on your desk.

    2. Cutting and Shaping

    Time to get out your saw! Carefully cut the wood to your desired dimensions. Use a ruler and pencil to mark your lines before cutting. Be sure to wear safety glasses when using any tools.

    For a more complex design, you'll need to cut out multiple pieces of wood and then glue them together. Be sure to use clamps to hold the pieces together securely while the glue dries.

    3. Sanding and Finishing

    Once you've got the basic shape, it's time to smooth out the edges. Start with a coarser grit sandpaper and work your way up to a finer grit. Sand all sides and corners until the wood is smooth and free of any rough spots.

    4. Staining and Sealing (Optional)

    If you want to add a little color or highlight the natural beauty of the wood, apply a wood stain. Be sure to follow the instructions on the stain bottle carefully. Let the stain dry completely before moving on to the next step.

    To protect the wood and give it a nice sheen, apply a coat of polyurethane. You can use a satin or gloss finish depending on your preference. Let the polyurethane dry completely before handling the pencil holder.

    Adding Personal Touches

    Now for the fun part! Here are some ideas to personalize your pencil holder and make it truly unique:

    • Engraving: Add a special message or design using an engraving tool. You can find these at most craft stores.
    • Inlays: Get creative with different types of wood or materials to create a unique inlay pattern. This can be as simple as a small circle of a contrasting wood or as intricate as a detailed design.
    • Painted Accents: If you're feeling artistic, paint a fun design or pattern on the holder. You can use stencils or freehand it.
    • Metallic Embellishments: Add a touch of glam with metal accents like studs, rivets, or even small pieces of jewelry. You can find these at craft stores or online.

    Enjoying Your Creation

    Congratulations! You've just crafted a beautiful and unique wooden pencil holder. Now it's time to enjoy your handiwork! Place it proudly on your desk and admire your creativity. Or, even better, give it as a gift to someone special and watch their face light up with joy.

    Commonly Asked Questions

    Here are answers to some of the most common questions about crafting wooden pencil holders:

    1. What kind of wood is best for this project?

    You can use various types of wood, but hardwoods like walnut, maple, oak, or cherry are great options because they are sturdy and have beautiful grain patterns. Softwoods like pine or cedar are also suitable, but they might be a bit more prone to dents or scratches. Choose the wood that fits your style and budget!

    2. How can I make sure my pencil holder is sturdy?

    Use a strong adhesive like wood glue to secure the pieces together. Also, consider using dowels or other reinforcement techniques if you're creating a more complex design. Let the glue dry completely before using the pencil holder.

    3. What if I don't have any tools?

    No worries! You can often find pre-cut pieces of wood at craft stores. These are great for beginners because they require minimal cutting. You can also use a simple hand saw for cutting and a piece of sandpaper to smooth out the edges.

    4. What can I do if my holder doesn't turn out exactly how I planned?

    Don't worry, it happens to the best of us! With a little creativity, you can often turn a mistake into a design element. You can also sand down any imperfections and start over if needed. The most important thing is to have fun and experiment!

    So, what are you waiting for? Gather your supplies, choose your design, and get crafting! You'll be amazed by the beautiful and unique pencil holder you create.

    [Continue reading...]

    Outdoor Wood Project Ideas to Enhance Your Yard or Patio

    - 0 comments
    Outdoor Wood Project Ideas to Enhance Your Yard or Patio

    Outdoor Wood Project Ideas to Enhance Your Yard or Patio

    Looking to add a touch of warmth and natural beauty to your outdoor space? Wood is a versatile material that can bring life and character to any yard or patio. From functional furniture to decorative accents, the possibilities are endless!

    Let's explore some inspiring outdoor wood project ideas that you can tackle yourself, transforming your backyard into a haven of relaxation and style.

    Charming Furniture for Outdoor Relaxation

    Outdoor furniture is essential for enjoying the outdoors. Wood's natural beauty and durability make it perfect for creating comfortable and stylish seating areas.

    Rustic Wooden Bench

    A simple wooden bench adds a touch of rustic charm to any garden or patio. You can build one from scratch using reclaimed wood for a truly unique piece.

  • Choose sturdy, weather-resistant wood like cedar or redwood.
  • Plan your design and cut the wood to size.
  • Assemble the bench using screws or wood glue.
  • Finish with a weather-resistant sealant for protection.
  • Cozy Outdoor Sofa

    Upgrade your outdoor lounging experience with a custom-built wooden sofa. For a modern look, consider using sleek, contemporary wood like teak.

  • Design the sofa frame with comfortable dimensions and armrests.
  • Select durable outdoor cushions for added comfort.
  • Add decorative throw pillows for a touch of color and personality.
  • Use a wood stain or paint to protect and enhance the wood's appearance.
  • Charming Wooden Swing

    Embrace childhood memories with a handcrafted wooden swing. It's a fun and inviting addition to any backyard, perfect for relaxing and enjoying the fresh air.

  • Use sturdy lumber like oak or pine for the swing frame.
  • Create a comfortable seat with durable rope or chain.
  • Install sturdy support beams and a hanging system.
  • Consider adding a decorative canopy for shade.
  • Creative Garden Structures and Decor

    Wood adds a natural touch to your garden, creating inviting spaces and eye-catching focal points.

    Rustic Trellis for Climbing Plants

    A wooden trellis provides vertical support for climbing plants, creating a lush and vibrant backdrop for your garden.

  • Design a simple lattice pattern or a more elaborate design.
  • Use pressure-treated wood to resist rot and insects.
  • Secure the trellis firmly to the ground or a wall.
  • Plant climbing vines, flowers, or vegetables to create a living wall.
  • Charming Wooden Planter Boxes

    Wooden planter boxes add a touch of rustic elegance to your patio or garden.

  • Choose a wood that complements your existing decor.
  • Customize the size and shape to fit your plants and space.
  • Create drainage holes for proper water flow.
  • Add decorative elements like a raised lip or decorative trim.
  • Unique Wooden Birdhouse

    Attract feathered friends to your yard with a handcrafted wooden birdhouse.

  • Choose a design that suits the birds in your area.
  • Use weather-resistant wood and paint for durability.
  • Include a perch and an easily accessible entrance hole.
  • Install it in a safe and sheltered location.
  • Practical and Stylish Wood Projects

    Wood isn't just for furniture and decor. It can also add functionality and beauty to your outdoor space.

    Durable Wooden Deck

    A wooden deck expands your living area, creating a perfect space for outdoor dining, entertaining, or simply relaxing.

  • Plan your design and choose durable wood like cedar, redwood, or composite.
  • Build a strong and stable frame to support the deck boards.
  • Install the deck boards with proper spacing for drainage.
  • Add railings and steps for safety and accessibility.
  • Stylish Wooden Gate

    A wooden gate adds privacy and security to your yard, while also enhancing its visual appeal.

  • Choose a sturdy wood and design that complements your fence or landscaping.
  • Install hinges and a secure latch.
  • Add decorative features like a latch handle or a decorative border.
  • Finish with a protective sealant or paint.
  • Practical Wooden Storage Bench

    A wooden storage bench combines functionality with style, providing a convenient place to store cushions, tools, or other outdoor items.

  • Build a sturdy bench frame with a hinged lid.
  • Install hinges and a latch for secure closure.
  • Add cushions or pillows for comfort.
  • Use a weather-resistant sealant to protect the wood.
  • Commonly Asked Questions

    What types of wood are best for outdoor projects?

    Some popular choices include:

  • Cedar: Naturally resistant to rot and insects, cedar offers a warm, reddish-brown color.
  • Redwood: Similar to cedar in durability and appearance, redwood has a slightly pinker hue.
  • Teak: Known for its longevity and oiliness, teak is naturally resistant to weathering and insects.
  • Pressure-treated wood: This option is treated with chemicals to resist rot, insects, and moisture.
  • How do I protect outdoor wood from weathering?

    Use a weather-resistant sealant or paint to protect the wood from the elements.

  • Stain: Penetrates the wood to protect it from moisture and UV rays while enhancing its natural grain.
  • Paint: Creates a protective barrier that seals the wood and allows you to personalize its color.
  • What tools do I need for outdoor wood projects?

    Depending on the project, you'll likely need tools like:

  • Saw (circular saw, miter saw, hand saw): For cutting wood to size.
  • Drill: For creating holes for screws, hinges, or other fasteners.
  • Screwdriver: For securing screws and other hardware.
  • Hammer: For driving nails and securing other fasteners.
  • Measuring tape: For accurate measurements and cutting.
  • Level: For ensuring the project is straight and level.
  • Safety gear: Eye protection, gloves, and hearing protection are essential for safe work.
  • With a little planning and creativity, you can transform your outdoor space into a cozy and stylish retreat using wood. Embrace the natural beauty and warmth of this versatile material, and enjoy the fruits of your labor as you relax in your enhanced backyard paradise!

    [Continue reading...]

    Budget-Friendly Lawn Chair Projects That Are Easy to Build and Sell

    - 0 comments
    Budget-Friendly Lawn Chair Projects That Are Easy to Build and Sell

    Budget-Friendly Lawn Chair Projects That Are Easy to Build and Sell

    In the realm of DIY endeavors, crafting lawn chairs presents a delightful blend of functionality and creativity. Not only can you furnish your own outdoor spaces with charming, personalized seating, but you also have the opportunity to tap into a burgeoning market eager for unique and affordable outdoor furniture. This guide will delve into budget-friendly lawn chair projects that are simple to construct and hold the potential for profitable sales.

    Choosing the Right Materials

    The foundation of any successful lawn chair project lies in selecting the appropriate materials. Opting for cost-effective yet durable options will ensure both affordability and longevity.

    Wood

    Wood remains a timeless and versatile material for lawn chair construction. Consider the following options:

    • Pine: An inexpensive softwood that is readily available. It's easy to work with but may require a protective finish to withstand the elements.
    • Cedar: Known for its natural resistance to rot and insects, cedar is a good choice for outdoor furniture. While more expensive than pine, its durability makes it a worthwhile investment.
    • Reclaimed wood: Repurposing old wooden pallets, beams, or other salvaged materials can create unique and eco-friendly chairs while saving you money.

    Metal

    Metal offers a modern and sturdy alternative to wood. Steel and aluminum are popular choices:

    • Steel: Strong and durable, steel requires a protective coating to prevent rust. You can find affordable steel tubing and rods at hardware stores.
    • Aluminum: Lightweight and rust-resistant, aluminum is an excellent choice for chairs that will be exposed to the elements. It can be more expensive than steel.

    Plastic and Other Materials

    For a more unconventional approach, consider these options:

    • PVC pipe: Affordable and readily available, PVC pipe can be used to create a lightweight and surprisingly sturdy chair frame.
    • Recycled plastic: Upcycled plastic bottles, jugs, and containers can be woven or braided to create unique and environmentally friendly chairs.

    Easy-to-Build Lawn Chair Projects

    Once you've chosen your materials, it's time to select a project that aligns with your skills and budget. Here are some beginner-friendly ideas:

    Adirondack Chair

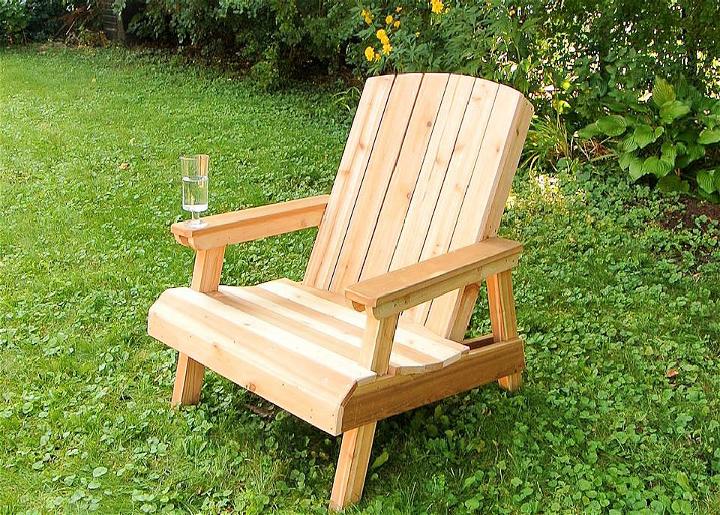
    The classic Adirondack chair is a timeless design that is both comfortable and stylish. You can find numerous free plans online for building Adirondack chairs using wood or even PVC pipe. The simple construction involves cutting and assembling a few basic pieces. To make the process even easier, purchase pre-cut lumber from a home improvement store.

    Folding Lawn Chair

    A folding lawn chair is a practical and portable seating option. These chairs are often made from wood or metal and can be purchased as kits or built from scratch. Look for plans that feature simple designs and utilize readily available materials.

    Hanging Chair

    A hanging chair offers a unique and relaxing seating experience. You can create a hanging chair using a sturdy rope or chain and a woven or fabric seat. Consider using an old tire, a repurposed hammock, or a DIY fabric sling as the seat base.

    Pallet Chair

    Transforming old pallets into charming lawn chairs is a popular and eco-friendly option. The rustic aesthetic of pallets can add a unique touch to your outdoor space. Numerous online tutorials demonstrate how to disassemble and repurpose pallets into various chair styles. Be sure to sand and finish the wood for a smooth and durable surface.

    Tips for Successful Sales

    Once you've crafted your lawn chairs, it's time to turn your passion into profit. Here are some tips for maximizing your sales potential:

    Promote Your Craftsmanship

    • Showcase your work: Create a visually appealing online portfolio or social media presence. Use high-quality photographs to highlight the craftsmanship and uniqueness of your chairs.
    • Highlight your materials: Clearly describe the materials you use, especially if you focus on eco-friendly or recycled options.
    • Offer custom options: Allow customers to personalize their chairs by selecting wood stains, fabrics, or even specific designs.

    Price Your Chairs Competitively

    • Research the market: Check out prices of similar lawn chairs at local stores and online retailers.
    • Factor in costs: Calculate your material expenses, labor, and overhead costs to arrive at a fair selling price.
    • Consider discounts: Offer discounts for bulk purchases or early bird orders to incentivize sales.

    Expand Your Sales Channels

    • Online marketplaces: Etsy, Facebook Marketplace, and Craigslist are popular platforms for selling handmade goods.
    • Local markets and events: Participate in craft fairs, farmers' markets, and other community events to reach a wider audience.
    • Direct sales: Promote your chairs through social media, word-of-mouth, or by placing flyers in local businesses.

    Conclusion

    Crafting budget-friendly lawn chairs is a fulfilling and potentially lucrative venture. By choosing affordable materials, selecting easy-to-build designs, and employing effective sales strategies, you can turn your passion for DIY into a profitable side hustle or even a full-time business. So, gather your tools, embrace your creativity, and embark on a journey to design and sell charming, personalized lawn chairs that bring comfort and style to outdoor spaces everywhere.

    [Continue reading...]

    Wooden Toys with Interactive Features for Sensory Development

    - 0 comments
    Wooden Toys with Interactive Features for Sensory Development

    Wooden Toys with Interactive Features for Sensory Development

    In the realm of childhood development, toys play a pivotal role in fostering cognitive, social, and emotional growth. Among the diverse range of toys available, wooden toys stand out as a timeless and enriching choice, particularly those imbued with interactive features that cater to sensory development. Wooden toys, with their natural warmth and durability, offer a tactile and engaging experience that stimulates a child's senses, promoting exploration and learning.

    The Importance of Sensory Development

    Sensory development is the foundation upon which a child's understanding of the world is built. It encompasses the ability to perceive and interpret sensory input from the five senses â€" sight, touch, taste, smell, and hearing. Through sensory experiences, children learn about their surroundings, develop motor skills, and build social and emotional connections. Engaging toys with interactive features play a vital role in stimulating sensory development, providing children with opportunities to explore, experiment, and learn through play.

    Wooden Toys for Sensory Exploration

    Wooden toys, with their inherent tactile qualities, offer a rich sensory experience for children. Their natural texture and weight provide a grounding and reassuring feel, while their versatility allows for diverse forms of interaction.

    Tactile Stimulation

    Wooden toys provide a unique tactile experience that stimulates a child's sense of touch. The smooth, textured, or rough surfaces of wooden toys engage the fingertips, promoting fine motor skills and tactile discrimination. From the smooth curves of a wooden train to the intricate details of a puzzle, each toy offers a distinct tactile sensation that encourages exploration and discovery.

    Auditory Stimulation

    Wooden toys often incorporate auditory elements that stimulate a child's sense of hearing. The gentle clinking of wooden blocks, the rhythmic tapping of a wooden xylophone, or the creaking of a wooden rocking horse all create pleasing sounds that capture a child's attention and promote auditory awareness. These sounds also encourage language development and provide a platform for imaginative play.

    Visual Stimulation

    Wooden toys often feature vibrant colors, intricate designs, and unique shapes that visually stimulate a child's sense of sight. The contrasting colors of building blocks, the intricate patterns of a wooden puzzle, or the captivating designs of a wooden dollhouse all provide visual interest and promote cognitive development.

    Interactive Features for Enhanced Sensory Play

    Wooden toys with interactive features take sensory play to the next level. These features can range from simple mechanisms to complex systems that encourage exploration, problem-solving, and creativity.

    • Spinning Gears: Wooden toys with spinning gears engage a child's sense of touch and sight, allowing them to manipulate the gears and observe their movement. These toys also promote spatial awareness and hand-eye coordination.
    • Sliding Beads: Wooden toys with sliding beads provide tactile stimulation and encourage fine motor development. The act of sliding beads along a track promotes hand-eye coordination and strengthens small muscles.
    • Stacking Rings: Stacking rings offer a playful challenge that encourages problem-solving skills and hand-eye coordination. The different sizes and shapes of the rings provide tactile stimulation, while the act of stacking promotes spatial awareness.
    • Musical Instruments: Wooden musical instruments, such as xylophones, tambourines, and drums, provide auditory stimulation and encourage musical exploration. These toys also promote creativity and self-expression.

    Benefits of Wooden Toys with Interactive Features

    Wooden toys with interactive features offer a multitude of benefits for children, promoting not only sensory development but also cognitive, social, and emotional growth. Here are some key benefits:

    • Enhanced Sensory Exploration: Interactive features stimulate a child's senses, providing them with diverse experiences and opportunities for exploration.
    • Cognitive Development: These toys encourage problem-solving, spatial awareness, and critical thinking skills.
    • Fine Motor Skills: Interactive features often require precise movements, strengthening fine motor skills and hand-eye coordination.
    • Imaginative Play: Interactive wooden toys ignite a child's imagination, allowing them to create stories, scenarios, and roles through play.
    • Social Interaction: Some toys promote social interaction by providing opportunities for children to play together and collaborate.

    Choosing the Right Wooden Toys

    When selecting wooden toys with interactive features, consider the child's age, developmental stage, and interests. Look for toys that are well-made, durable, and safe. Opt for toys with smooth edges and non-toxic finishes to ensure a safe and enjoyable play experience. By choosing wooden toys with interactive features, you can provide children with a foundation for sensory development, creativity, and a love for learning through play.

    [Continue reading...]

    Floating Shelves for Your Home Bar: Store Liquor and Glassware in Style

    - 0 comments
    Floating Shelves for Your Home Bar: Store Liquor and Glassware in Style

    Floating Shelves for Your Home Bar: Store Liquor and Glassware in Style

    Hey there, fellow home bar enthusiasts! You know the feeling - you've got a killer collection of spirits, a diverse array of glassware, and a hankering to create the ultimate home bar setup. But where on earth do you store it all? Fear not, because floating shelves are here to save the day (and your sanity!).

    These sleek and stylish beauties are perfect for showcasing your barware while keeping your space organized and, dare we say, downright glamorous. Plus, they're incredibly versatile, fitting seamlessly into any style of home bar, from modern minimalist to rustic farmhouse.

    Ready to transform your home bar into a haven of spirits and sophistication? Let's dive into the wonderful world of floating shelves!

    The Benefits of Floating Shelves

    Why are floating shelves such a hot commodity in the world of home bar design? It's simple, really: they offer a unique blend of functionality and aesthetics.

    Space-Saving Savvy

    Floating shelves, by their very nature, eliminate the need for bulky cabinets and bulky furniture. This open design creates an airy, uncluttered feel, making your home bar appear larger and more inviting.

    Stylish Statement

    Floating shelves are a modern, minimalist touch that instantly elevates the look of your bar. You can create a truly custom look by playing with shelf size, material, and arrangement, seamlessly integrating your bar with the rest of your home decor.

    Ultimate Organization

    Organize your bottles, glasses, and bar tools with ease! Floating shelves provide dedicated space for everything you need to whip up the perfect cocktail. Strategically placing shelves allows you to categorize your liquor collection and display your finest glassware proudly.

    Floating Shelf Styles: Finding the Perfect Fit

    The beauty of floating shelves is their adaptability. They can be tailored to your unique taste and style. Let's explore some popular options:

    Wood Wonders

    Warm, natural, and versatile - wood shelves effortlessly blend into any home bar aesthetic. From rich walnut to rustic reclaimed wood, you can find a shade that complements your existing decor. The texture of wood adds a touch of warmth and character to your bar setup.

    Metal Marvels

    Embrace industrial chic with sleek metal shelves. Black metal shelves offer a dramatic, contemporary feel, while brushed steel adds a touch of sophistication. Metal shelves are durable and can handle even the heaviest of spirits bottles.

    Glass Glamour

    Want to create a truly modern and minimalist vibe? Glass shelves are the way to go. They offer an airy and transparent look, showcasing your barware without feeling bulky. Consider tinted glass for a touch of color or etched glass for a unique design.

    Planning Your Floating Shelf Layout

    Now for the fun part - planning your floating shelf setup! Here are a few key considerations to maximize both style and functionality.

    Measure Your Space

    Before you start shopping, measure your bar area meticulously. This will help you determine the ideal shelf size, number of shelves, and spacing to ensure a balanced and functional arrangement. Take into account the height of your liquor bottles and glassware.

    Create a Visual Blueprint

    Sketch out a rough outline of your bar area, experimenting with different shelf configurations. Consider the placement of your bar sink, countertop, and other appliances to ensure optimal flow and accessibility. There are also handy online tools that can help you visualize different shelf layouts.

    Prioritize Functionality

    Think about how you'll use your shelves on a daily basis. Where will you keep your frequently used spirits? How will you display your favorite glassware? By prioritizing functionality, you'll create a bar setup that's both stylish and practical.

    Decorative Touches: Elevate Your Bar

    Once your shelves are up, it's time to add those finishing touches that truly elevate your bar's aesthetic:

    • Backlighting: Accentuate your shelves with LED strips for a dramatic and modern effect. Choose warm white or cool white depending on your desired ambiance.
    • Greenery: A touch of greenery adds a natural, calming touch to your home bar. Consider small succulents, air plants, or a miniature herb garden to enhance the space.
    • Barware Displays: Showcase your favorite cocktail shakers, muddlers, and other bar tools in a decorative manner. You can also use decorative trays to group similar items and add visual interest.
    • Wall Art: A piece of art or a collection of framed prints can complement your bar's style and create a visual focal point.

    Commonly Asked Questions

    What are the best materials for floating shelves?

    The best material depends on your style and budget. Wood is classic and versatile. Metal is durable and adds an industrial touch. Glass offers a minimalist look. Consider your existing decor and desired aesthetic when making your choice.

    How do I install floating shelves?

    Installation methods vary depending on the type of shelf and your wall material. Some shelves use simple brackets that screw into the wall, while others require more complex installation. Consult the manufacturer's instructions or seek professional help if needed.

    How do I clean floating shelves?

    Cleaning is easy! Simply dust or wipe down your shelves with a damp cloth. Avoid using harsh chemicals or abrasive cleaners, as they can damage the finish.

    There you have it, folks - a complete guide to creating a stylish and functional home bar using floating shelves. Embrace your inner mixologist and let your bar shine! Cheers to beautiful spaces and well-crafted cocktails!

    [Continue reading...]

    Step-by-Step Guide to Making Wooden Key Racks for Sale

    - 0 comments
    Step-by-Step Guide to Making Wooden Key Racks for Sale

    Step-by-Step Guide to Making Wooden Key Racks for Sale

    Hey there, fellow woodworkers! Are you looking for a fun and profitable woodworking project that's perfect for both beginners and experienced crafters? Look no further than making wooden key racks! They're not only practical and stylish but also a great way to showcase your skills and creativity.

    In this guide, we'll walk you through the entire process, from design to finishing, providing you with everything you need to start making and selling your own handcrafted key racks. So, grab your tools and let's get started!

    Choosing Your Design

    The first step is to decide on the design of your key rack. Think about the style you want to achieve, the size you need, and the features you want to include. There are endless possibilities!

    Here are some design ideas to get you started:

    • Simple and Modern: A clean, rectangular shape with hooks, maybe a minimalist touch like a small metal ring or a unique woodgrain pattern.
    • Rustic and Farmhouse: Use reclaimed wood with a natural finish, add a touch of farmhouse charm with a metal sign or some distressed paint.
    • Contemporary: Experiment with geometric shapes, bold colors, and unique finishes like epoxy resin.
    • Personalized: Add a personalized touch with laser engraving, custom lettering, or even a small pocket for mail or notes.

    Once you've chosen your design, make a sketch or a digital drawing to help visualize the final product. This will be your roadmap for the rest of the process.

    Gathering Your Materials

    Now that you have your design in mind, it's time to gather the materials you'll need. Here's a basic list to get you started:

    • Wood: Consider your design and choose the right type of wood. For example, pine is affordable and easy to work with, oak offers durability and a classic look, and walnut adds a touch of luxury.
    • Hooks: You'll need hooks to hold your keys. Choose a style that complements your design, like metal hooks, wooden pegs, or decorative hooks.
    • Hardware: This might include screws, nails, brackets, or other fasteners depending on your design.
    • Wood glue: You'll need wood glue to secure your pieces together.
    • Wood stain or paint: This depends on your desired finish.
    • Sandpaper: You'll need sandpaper to smooth out rough edges and imperfections.
    • Finishing supplies: This might include a wood sealer, varnish, or polyurethane to protect your key rack from scratches and moisture.

    Remember, this is just a basic list. You might need additional materials based on your specific design. It's always a good idea to visit your local hardware store and get advice from the professionals.

    Cutting and Assembling the Pieces

    With your materials gathered, you're ready to start building! Here are the basic steps for cutting and assembling the pieces of your key rack:

    1. Cut the wood: Using your design as a guide, carefully cut your wood pieces to the correct dimensions. If you're using a saw, be sure to wear safety goggles and follow safety procedures.
    2. Sand the edges: Once the wood is cut, sand all the edges smooth to prevent splinters and to create a smooth finish.
    3. Drill holes for hooks: If using hooks, drill pilot holes for them. Make sure the holes are the correct size for your chosen hooks.
    4. Glue and assemble the pieces: Use wood glue to join the pieces together. Clamp them firmly in place and allow the glue to dry completely before moving on.
    5. Attach hooks: After the glue has dried, attach the hooks to the key rack using screws or nails.

    Be sure to check your design and make sure all pieces fit together properly before attaching hooks.

    Finishing Your Key Rack

    Once your key rack is assembled, it's time to give it a final touch. Here's how to finish your key rack:

    1. Sand again: Sand the entire surface of your key rack to remove any imperfections or rough spots. Use progressively finer grits of sandpaper for a smoother finish.
    2. Apply a wood stain or paint: If you're using stain, apply it evenly with a brush or cloth. Let it dry completely and then apply a second coat if needed. If using paint, apply a couple of thin coats, allowing each coat to dry completely before applying the next.
    3. Apply a sealer or finish: Apply a protective finish like varnish, polyurethane, or wax. This will protect the key rack from scratches, moisture, and dirt. Let it dry completely before handling.
    4. Add any additional details: If you're adding a personalized touch like an inscription or a design, do so at this stage. You can use a laser engraver, a wood burning tool, or even paint.

    And there you have it! Your handmade wooden key rack is ready for sale.

    Marketing and Selling Your Key Racks

    Now that you've created beautiful key racks, it's time to find buyers! Here are some ideas for marketing and selling your creations:

    • Online Marketplaces: Sell your key racks on online platforms like Etsy, Amazon Handmade, or Facebook Marketplace. These platforms provide a large audience of potential customers.
    • Local Craft Shows: Participate in local craft fairs and markets to showcase your work and connect with potential customers in person.
    • Social Media: Promote your key racks on social media platforms like Instagram, Facebook, and Pinterest. Use eye-catching photos and videos to highlight their unique features.
    • Your Own Website: Create a simple website to showcase your key racks, provide information about your products, and offer online ordering.
    • Local Shops: Contact local gift shops, home decor stores, or boutiques to inquire about selling your key racks on consignment.

    Remember, the key to success is to create high-quality key racks that are both aesthetically pleasing and functional. Don't be afraid to experiment with different designs, finishes, and materials to find your niche and stand out in the market.

    Tips for Success

    Here are some additional tips to help you succeed in selling your wooden key racks:

    • High-Quality Materials: Use high-quality wood, hardware, and finishing supplies to ensure your key racks are durable and long-lasting.
    • Attention to Detail: Pay attention to detail in every step of the process, from cutting and sanding to finishing and packaging. A well-made key rack will make a lasting impression on your customers.
    • Competitive Pricing: Research the market to set competitive prices for your key racks. Consider the cost of materials, your time and effort, and the market value of similar products.
    • Customer Service: Provide excellent customer service to build relationships with your customers. Respond promptly to inquiries, address any issues quickly, and go the extra mile to ensure their satisfaction.
    • Marketing and Promotion: Don't be afraid to promote your key racks! Use a variety of channels to reach your target audience.

    Making wooden key racks is a rewarding and potentially profitable venture. With a little planning, creativity, and effort, you can turn your passion for woodworking into a successful business. So, get your tools ready and start crafting those beautiful key racks!

    [Continue reading...]

    Thursday, November 14, 2024

    Stylish Wooden Key Racks with Hooks and Shelving for Extra Function

    - 0 comments
    Stylish Wooden Key Racks with Hooks and Shelving for Extra Function

    Stylish Wooden Key Racks with Hooks and Shelving for Extra Function

    Tired of losing your keys in the abyss of your purse or the dark corners of your entryway? We’ve all been there. And let's be honest, a messy entryway can really set the tone for the whole house, so it’s time to ditch the chaotic key pile and embrace a stylish and functional solution: a wooden key rack with hooks and shelving!

    Not only will a wooden key rack keep your keys organized, but it can also add a touch of warmth and character to your home. With endless options in styles, sizes, and materials, finding the perfect wooden key rack for your space is easier than ever.

    Why Choose a Wooden Key Rack?

    Wooden key racks are a popular choice for a reason! They offer several benefits that other key racks might not:

    • Natural Beauty: The warmth and texture of wood instantly elevate your entryway, bringing a touch of nature indoors. Whether it's a sleek modern design or rustic farmhouse style, wood adds a timeless elegance.
    • Durability: Well-made wooden key racks are built to last. Unlike some plastic or metal key racks that can easily bend or break, wood is sturdy and can withstand the test of time.
    • Versatility: Wooden key racks come in all shapes and sizes, from compact wall-mounted options to freestanding designs with extra storage. You're bound to find one that fits perfectly in your space and meets your specific needs.
    • Easy to Clean: Simply dust or wipe down your wooden key rack with a damp cloth. No need for harsh chemicals or special cleaning solutions.

    Key Rack Features to Consider

    Before you start browsing for your perfect wooden key rack, take a moment to think about the features that are most important to you.

    Number of Hooks

    Consider how many keys you need to store, and choose a key rack with enough hooks for your household. You can always get a multi-tiered rack for more hooks or a separate rack for your other household members.

    Shelf Space

    A key rack with a shelf can provide additional storage for mail, sunglasses, hats, or other items you might need to keep organized by the door.

    Size and Dimensions

    Measure the space where you plan to install your key rack. You don’t want it to be too large or too small for the space, and consider the size of the items you might be storing on the shelves. Remember, you'll need enough room to open the door fully without hitting your new key rack.

    Style

    Wooden key racks come in a variety of styles to complement any décor. Think about your home's overall style: rustic, modern, farmhouse, minimalist, etc. Do you want a key rack with intricate carvings or something sleek and simple? A little browsing will help you find a style that you love!

    Material

    Most wooden key racks are made from a variety of wood types, like pine, oak, walnut, and mahogany. Some may even be made from reclaimed wood, offering a unique touch and eco-conscious option. Think about the look and durability you want in a wooden key rack. You can find beautiful options made from different types of wood, depending on your taste and budget.

    Creative Ideas for Using Your Wooden Key Rack

    Think outside the box! You can use your wooden key rack to organize more than just keys. Here are some creative ideas to get you started:

    • Jewelry Organizer: Use the hooks to hang necklaces, bracelets, and earrings, while the shelf can hold your favorite perfume or watches. This can turn your key rack into a stylish jewelry stand in your bedroom or bathroom.
    • Bathroom Accessories: A wooden key rack in the bathroom can hold towels, robes, and even small baskets for toiletries or makeup. It's a beautiful alternative to traditional bathroom storage options.
    • Office Organizer: Use a wooden key rack in your home office to organize headphones, charging cords, or even lightweight tools. The shelf can hold papers or writing supplies.
    • Kitchen Organizer: Hang kitchen utensils on the hooks and use the shelf for spices or small appliances. It's a stylish and convenient way to keep your kitchen organized.

    Where to Find Stylish Wooden Key Racks

    With so many options available, you can find the perfect wooden key rack for your home in a variety of places.

    • Home Decor Stores: Big box stores like Target, Walmart, and Ikea offer a wide selection of wooden key racks at affordable prices. You're sure to find a key rack that fits your budget and style.
    • Online Retailers: Websites like Amazon, Etsy, and Wayfair offer a vast collection of wooden key racks from various brands and independent artisans. This gives you a chance to discover unique designs and styles.
    • Local Furniture Stores: Many furniture stores carry stylish and high-quality wooden key racks. If you prefer to see the key racks in person before purchasing, this is a great option.
    • Antique Shops and Flea Markets: If you love vintage finds, explore antique shops and flea markets for unique wooden key racks. You might even find a piece with a rich history and character.

    Conclusion

    A stylish wooden key rack with hooks and shelving is more than just a place to store your keys â€" it's a statement piece that can elevate your entryway and keep your home organized. From modern designs to rustic farmhouse styles, there's a wooden key rack for every taste and budget. So ditch the messy key pile and find the perfect wooden key rack to welcome guests with style and functionality!

    [Continue reading...]
     
    Copyright © 2012. Sania twain - Posts · Comments
    Powered by Blogger